OverviewCombat RulesStage GameplayHollow ExplorationNeighborhood InfoRidu EncyclopediaEnemy IntelligenceUncategorized
There are 40 tutorials that focus on combat mechanics:
| Basic Controls |
|---|

Use W / S / A / D to move around. Use the virtual joystick Use |
| Agent Info Panel |
 Your character's current HP is displayed at the top left of the screen. Your character's current Energy is displayed below their HP. Your character's Decibels are displayed on the left. |
| Enemy Info Panel |
 The enemy's HP is displayed above the enemy. Their Daze is displayed below their HP. When an enemy is Stunned, their Stun DMG Multiplier is displayed below their Daze. The enemy's current Attribute Anomaly Buildup is displayed to the right of the health bar. For enemy bosses, their information is displayed at the top right of the screen. |
| Energy and Special Attacks |
 When your character hits enemies using Basic Attacks, Dodge Counters, etc., they will generate Energy. In addition, while in battle, your character's Energy automatically regenerates over time.  EX Special Attacks cost Energy. The Energy requirement to launch EX Special Attacks is displayed as a red cursor above the Energy bar. When a character does not have enough Energy, the Energy bar and When a character has enough Energy, the Energy bar and  When a character does not have enough Energy, press |
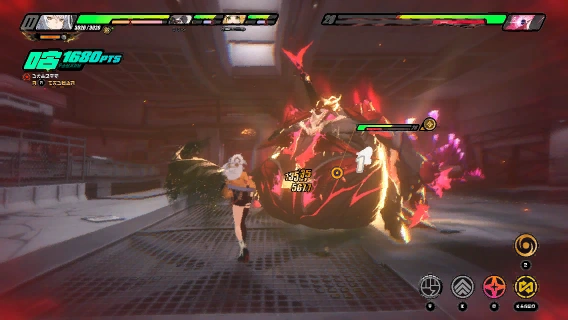
| Daze and Chain Attacks |
 Hitting enemies accumulates their Daze. The enemy's Daze is displayed below their HP. When an enemy's Daze reaches a certain level, they will become Stunned. At this point, the enemy's Daze bar will be displayed in color and gradually deplete with time. Stunned enemies cannot move or attack, and they take more damage. The Stun DMG multiplier is displayed below the Daze bar.  When there are two or more characters in your squad, hitting Stunned enemies with heavy attacks can trigger Chain Attacks. Typically, the last hit of Basic Attacks, Dodge Counters, Special Attacks, EX Special Attacks, Chain Attacks, and Ultimates have heavy attack effects.  2 consecutive Chain Attacks can be triggered when fighting Elite Enemies, and 3 consecutive Chain Attacks can be triggered when fighting Boss Enemies. When your squad doesn't have enough members, the available Chain Attack chances will decrease accordingly. Once all available Chain Attack chances are used, enemies' Daze will be displayed in gray and decrease with time until the Stunned effect ends. |
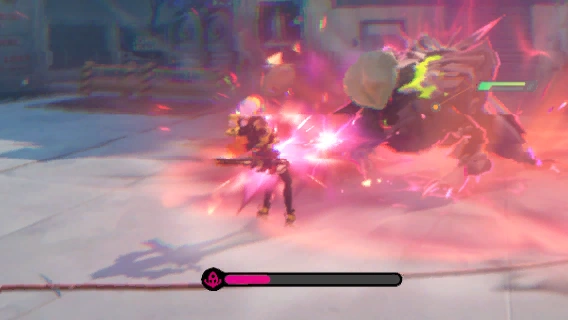
| Decibels and Ultimates |
 Characters' Decibels are displayed on the left side of the screen. Characters generate Decibels upon hitting enemies or launching specific skills. When a character generates Decibels, they will generate a certain proportion of Decibels for the rest of the squad as well. When Decibels reach 1,000/2,000/3,000, the Decibel Rating also increases in the order of Uproar/Blasting/Maximum.  Once Decibel Rating is at Maximum, press Typically, an Ultimate deals immense DMG and is highly effective at interrupting the target's action. Decibels are accumulated individually. You can plan when you would like to active who's Ultimate freely. |
| Dash and Parrying Bullets |
 When your character runs for a period of time or dodges forwards, they will begin Dashing. While Dashing, your character moves faster, and you can press  While Dashing, some characters automatically deflect incoming projectiles. |
| Dodge and Dodge Counters |
 Press  When your character is about to be attacked, press |
| Taking Damage and Quick Assists |
 When a character suffers a powerful attack, their current action might get interrupted, and they will become Staggered for a short period of time, unable to take any actions. Powerful attacks, depending on the attack strength, may cause light knockback, significant knockback, or even launch characters, causing them to Stagger for an increasing duration of time, respectively.  When the active character is launched, quickly press |
| Perfect Assists and Assist Follow-Ups |
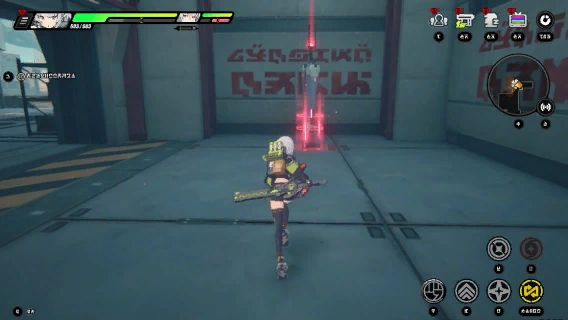
 Certain enemy attacks have a flashing prompt. When the flashing prompt is gold, press  After Perfect Assist is activated, press  Perfect Assist comes in two varieties. Defensive Assist allows you to parry enemy attacks, accumulating a significant amount of Daze, and interrupting most attacks. Evasive Assist enables you to dodge enemy attacks and triggers Vital View, during which all enemy actions are significantly slowed. Defensive Assist and Evasive Assist are each suited to countering different types of attacks.  When you run out of Assist Points, or when off-field characters' Perfect Assist types do not meet the trigger conditions, Perfect Assist will become unavailable. In this case, the golden prompt will become red instead. When enemies unleash specific attacks and the red flashing prompt appears, press |
| Damage Display and Attribute Counters |
 When a character deals damage of different Attributes, the damage numbers will be displayed in different colors, as follows: Physical DMG, Fire DMG, Ice DMG, Electric DMG, Ether DMG.  When an enemy's resistance to a certain type of attack is low, the DMG numbers for that attribute will flash white, and a golden triangle will appear on the icon to the right of its HP. When an enemy's resistance to a certain type of attack is high, the DMG numbers for that attribute will change to gray.  The damage numbers from critical hits will be displayed in a more obvious way. |
| [Shield] |
 Shield can absorb damage instead of HP. When a character or enemy gains Shield, it is displayed to the right of HP. |
| Impaired |
 Some enemies have breakable parts. Typically, these parts break after accumulating a certain amount of damage. When parts are broken, certain enemies may alter their attacks or forms. |
| Anomaly Buildup |
 When characters deal Attribute damage, Anomaly Buildup is accumulated. The enemy's current Anomaly Buildup is displayed to the right of its HP. When the Anomaly Buildup reaches its limit, the enemy will be afflicted with the corresponding Attribute Anomaly. The effect of an Attribute Anomaly is related to the characters who inflicted Anomaly Buildup and their contributions. |
| Attribute Anomaly - Physical |
 Dealing Physical DMG to enemies accumulates the Physical Attribute Anomaly, which subsequently triggers Assault and Flinch effects when enough is accumulated. Assault interrupts the enemy and deals massive Physical DMG, while Flinch increases the Daze the target takes for a period of time. |
| Attribute Anomaly - Fire |
 Dealing Fire DMG to enemies accumulates Fire Anomaly Buildup, which triggers the Burn effect. The Burn effect deals continuous Fire DMG for a period of time. Inflicting Burn on enemies weak to Fire DMG can interrupt their actions. |
| Attribute Anomaly - Ice |
 Dealing Ice DMG to enemies accumulates the Ice Attribute Anomaly, which triggers the Freeze and Frostbite effects. Freeze prevents taking action for a certain period, and triggers Shatter at the end of the effect, dealing Ice DMG. The Frostbite effect increases the CRIT DMG taken by the target for a period of time. |
| Attribute Anomaly - Electric |
Dealing Electric DMG to enemies accumulates Electric Anomaly Buildup, which triggers the Shock effect. The Shock effect causes the target to intermittently suffer additional Electric DMG when attacked for a period of time. Inflicting Shock on enemies weak to Electric DMG can interrupt their actions. |
| Attribute Anomaly - Ether |
 Dealing Ether DMG to enemies accumulates Ether Anomaly Buildup, which triggers the Corruption effect. The Corruption causes the target to suffer additional Ether DMG when attacked for a period of time. Inflicting Corruption on enemies weak to Ether DMG can interrupt their actions. |
| Attribute Anomaly - Disorder |
 Applying another type of Attribute Anomaly to an enemy that has already been afflicted with one overrides the original, and causes the Disorder effect. The Disorder effect is calculated based on the original Anomaly, dealing additional DMG and accumulating Daze. |
| Attribute Anomaly: Wind |
File:Tutorial Attribute Anomaly: Wind 1.gif Dealing Wind DMG inflicts Wind Anomaly Buildup on enemies and inflicts the Windswept state. Entering the Windswept state interrupts enemy actions and deals massive Wind DMG. While enemies are in the Windswept state, direct Wind DMG they take is increased based on the Wind Anomaly trigger's Tempest Coefficient. The first time the enemy takes Fire DMG, Ice DMG, Electric DMG, Physical DMG, or Ether DMG, the corresponding Contamination effect is triggered. While under Contamination, both direct Wind DMG and direct DMG from the triggering Contamination attribute are increased based on the Wind Anomaly trigger's Tempest Coefficient. During a single Windswept instance, Contamination can only be triggered this way once. After triggering Vortex, it is forcibly converted into the Vortex's corresponding Contamination state. |
| Attribute Anomaly - Vortex |
File:Tutorial Attribute Anomaly - Vortex 1.gif When applying a different type of Attribute Anomaly effect to an enemy already afflicted with an Attribute Anomaly, if one of the Anomaly effects is Windswept, the Disorder effect will not be triggered. Instead, the Vortex effect will be triggered: Upon triggering, the Attribute Anomaly other than Erosion will be finalized, dealing AoE Anomaly DMG of the corresponding attribute. For a period of time after triggering Vortex, Vortex cannot be triggered again. |
| Combat Bangboo |
 Each Combat Bangboo has its own Active Skill. When in combat, Combat Bangboo will automatically activate their Active Skill to support Agents in battle.  Some Combat Bangboo can launch Bangboo Chain Attacks. When these Bangboo are part of your squad, a Bangboo Chain Attack can be triggered following an Agent's Chain Attack, before the last squad member acts. The Bangboo Chain Attack does not count toward the total number of Chain Attacks in the chain. |
| Miasma Zone |
 The Miasma in this area will form Miasma Coagula, which enhance the Boss enemy. Miasma Coagula have special weak points that can be broken using the Disintegration technique, weakening the Boss's Miasmic Shield.  Following the Miasma flow in the scene will lead you to special weak points. |
| Observation Singularity |
 Observation Singularities can be found in the area. Interacting with them will reveal the locations of rare supplies on the map. Please note that Observation Singularities and rare supplies will not appear in Story Mode. |
| Fissure Beacon |
 The Fissure Beacon anchors stable fissures in the surrounding area, allowing for quick travel between regions. 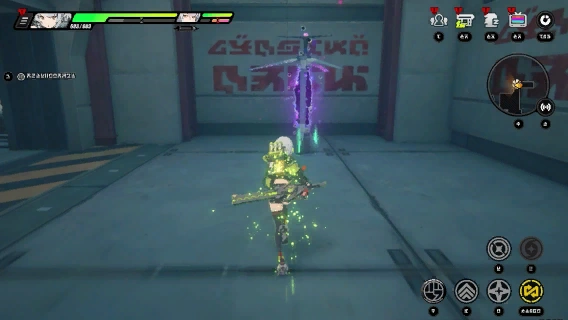 The Fissure Beacon can also restore HP, healing injured Agents. |
| Supplies Collection |
 Supply piles can only be collected once and will not respawn.  Small supply collection points will respawn on the second day after collection. Please note that there is a daily collection limit.  While Yixuan is in the Light as Air state, she can automatically collect resource points within a certain range. |
| Miasma Fog and Miasma Contamination |
 Toxic Miasma fog will appear along this path. Agents within it will suffer from contamination, and when the Miasma Contamination reaches its limit, all Agents in the squad will take DMG based on their current HP percentage. 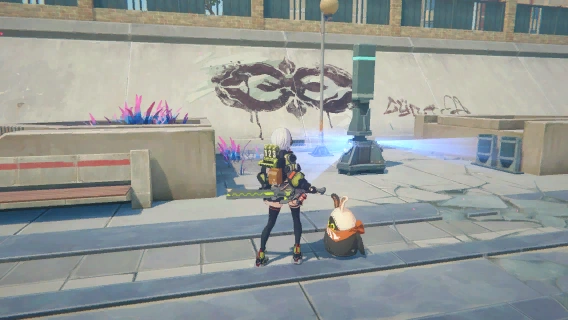 Stay away from the toxic fog to gradually reduce contamination. Approaching a Miasma Purifier will also quickly clear contamination. |
| Miasma Corruption Attacks and Miasma Pools |
 Some enemy attacks have the Miasma Corruption attribute. When they hit an Agent, the squad accumulates Miasma Contamination. When Miasma Contamination reaches its limit, all Agents in the squad receive damage based on a percentage of their current HP.  Some enemy skills will generate Miasma Pools on the ground. Miasma Pools cause additional effects on certain enemy skills. |
| The Disintegration Ability |
 Aim your crosshair at the Weak Point of the corrupted matter, then press  When all weak points on the surface of the corrupted matter are destroyed, the corrupted matter will collapse on its own. |
| The Revelation Ability |
 Aim your crosshair at the unstable structure, press |
| The Insight Ability |
 Aim your crosshair at the "clue", and hold |
| Twilight State Exalting Hymnist |
 In the Twilight state, Exalting Hymnist will summon Ethereals from Miasma Growths, and will continue summoning enemies until defeated, so should be prioritized. |
| Miasma Symbiotes |
 A Miasma Tumor is surrounded by several Miasma Nodes. Use the Disintegration ability to break all the Miasma Nodes, and the Miasma Tumor will enter an exposed state.  When exposed, repeatedly using "Disintegration" can break the Miasma Tumor's core; the exposed state won't last long, so hurry up and destroy that core! |
| Energy Shield |
 You can find a Prismatic Emitter and Refractor nearby. Use the Revelation Ability to confirm the device, emit a laser, and use the refraction device to guide the laser to the shield, causing it to dissipate. |
| Miasmic Fields and Miasmic Shields |
 Some Bosses will activate a Miasmic Field, granting enemies within it massive DEF and DMG reduction bonuses, as well as increased Anti-Interrupt capabilities.  When a Boss activates a Miasmic Field, they gain a Miasma Shield. While the Miasmic Shield is active, they cannot be Stunned. Agent attacks can reduce the Miasma Shield, with increased effectiveness when using Dodge Counters, Defensive Assists, and Ultimates.  When the Miasmic Shield is broken, enemies will take Purify DMG, and the Agent will recover Energy or Adrenaline. Nearby Miasmic Fields will also be cleared. |
| Miasma Growths |
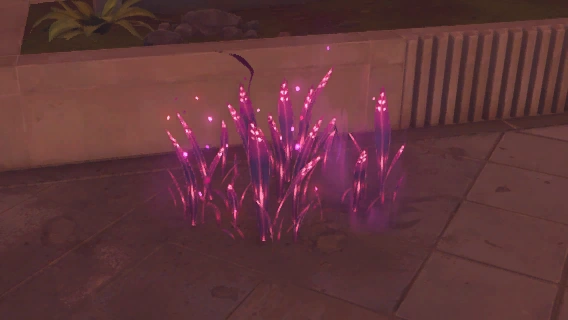 This is a condensed mass that constantly emits Miasma, attracting enemies. If you spot one, be ready for combat. |
| Sheer DMG & Miasmic Shields |
 Rupture characters deal Sheer DMG that ignores enemy defenses, dealing damage even against Bosses with Miasmic Shield. |
| The Revelation Ability |
File:Tutorial The Revelation Technique - Retrace Ability 1.gif Aim your crosshair at a Corrupted Object and hold |
| Exclusive W-Engine Effects |
 After equipping an exclusive W-Engine, the agent can activate the W-Engine switch.
|